Wow, what a long title. But this is the setup I want. Tutorials on the internet are either hard (impossible) to follow or outdated. Until today, I use JDBC persistence and MariaDB as database (because I already have it for my Nextcloud). For the data generated through my smart home, this is not the best choice. Soon I’ll also have photovoltaics on my roof where I want to do some visualization. So why not use the chance to move on and do a clean setup with all the things named in the title?
This is not an in-depth tutorial, just some notes about how to setup everything and get it running, fast. For each step, there are thousands of better tutorials 😉 I did not yet try out retention policies in InfluxDB or fancy magic in Grafana. So what to expect? First we create an InfluxDB instance and prepare the required tokens. After this, openHAB (which I assume to be running) will be configured to use InfluxDB as (another) persistence using the token. In the last step a Grafana instance is created and connected to InfluxDB, showing some data.
Step 1 – InfluxDB
InfluxDB’s official page on DockerHub explains everything about the required volume and basic setup. Since this is no fire-and-forget-setup, I won’t use automatic values. So just use the basic command (or, as I prefer, the composerized one):
  influxdb:
    image: influxdb
    container_name: influxdb
    restart: unless-stopped
    volumes:
      - /path/to/docker/volumes/InfluxDB:/var/lib/influxdb2
    ports:
      - '8086:8086'
After the initial setup it’s not required to expose any ports when docker containers can communicate through docker network. I use HomeKit and did not yet make it to run openHAB in Docker without host network (although some people suggest it might be possible). If your openHAB instance is not exposed via host network, you don’t need to expose container ports for InfluxDB.
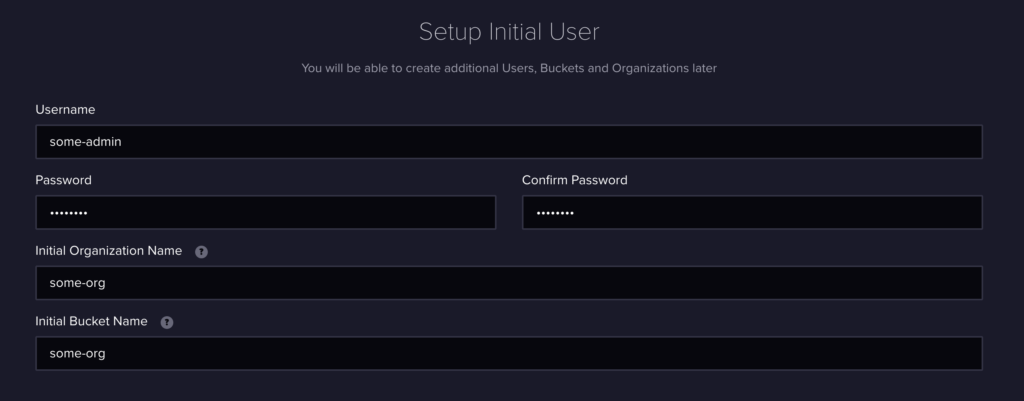
Navigate to your InfluxDB instance (e. g. http://localhost:8086) to start the setup process. Create an admin account with some generic org and bucket.
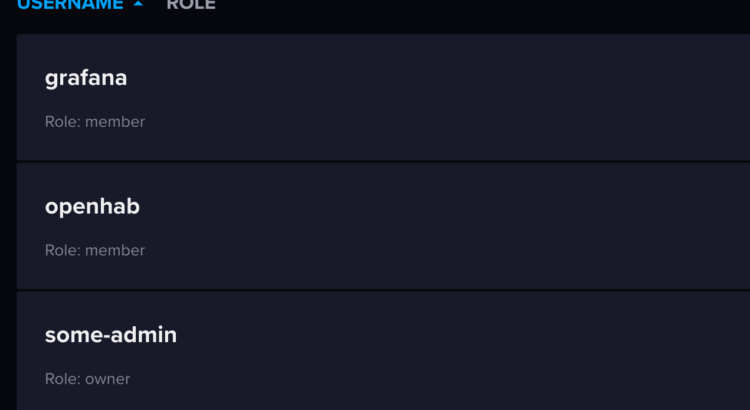
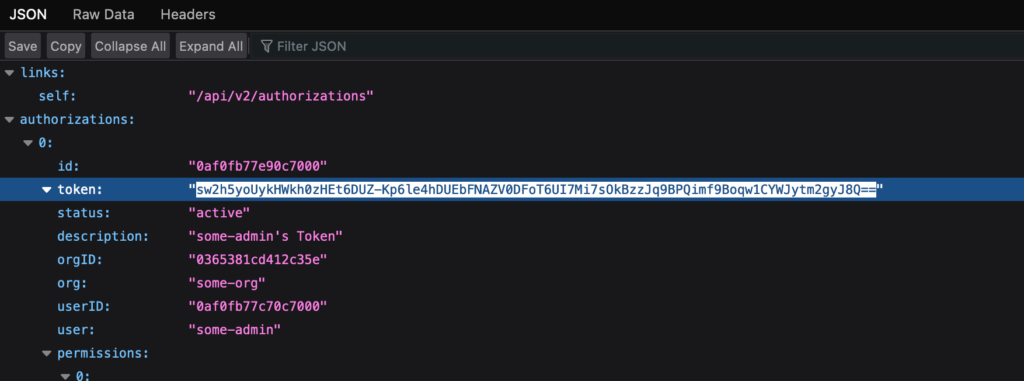
Select advanced setup method in the next screen (except you have other preferences). That’s all we do in the web interface, because for some reason it’s quite limited in functionality. Navigate to the raw authorization API page (e. g. http://127.0.0.1:8086/api/v2/authorizations). Copy the first token from your admin’s account. Of course, all tokens shown in this tutorial were created on a dummy instance, I just print them so it’s easier to follow 😉.
It’s terminal time! SSH into your server and connect to the InfluxDB docker instance:
docker exec -it influxdb /bin/bashAt the beginning we have to provide master token copied before. Since we don’t want it to appear in any command history, we do not paste it directly. Instead, use the read command, paste it in there and export it afterwards. Using this method, the token is present in the shell, but not exposed to its history. The name used for the variable is the default one from InfluxDB.
read INFLUX_TOKEN
export INFLUX_TOKEN
Now you can copy-paste the following block to the shell:
influx org create -n openhab -d openhab > /dev/null
influx bucket create -o openhab -n openhab -d openhab -r 0 > /dev/null
openhab_bucket_id=$(influx bucket list -o openhab | grep openhab | cut -f 1)
influx user create -o openhab -n openhab -p openhab-password > /dev/null
influx user create -o openhab -n grafana -p grafana-password > /dev/null
influx auth create -o openhab -u openhab -d openhab --read-bucket $openhab_bucket_id --write-bucket $openhab_bucket_id > /dev/null
influx auth create -o openhab -u grafana -d grafana --read-bucket $openhab_bucket_id > /dev/null
echo -n 'openHAB R/W token: '
influx auth list -u openhab | grep openhab | awk '{print $3}'
echo -n 'grafana RO token: '
influx auth list -u grafana | grep grafana | awk '{print $3}'
This code creates an org and bucket for openhab, adds openhab and grafana user to that org and grants read/write permission to openhab user, but only read permission to grafana user. In the end, two tokens are printed for later use:
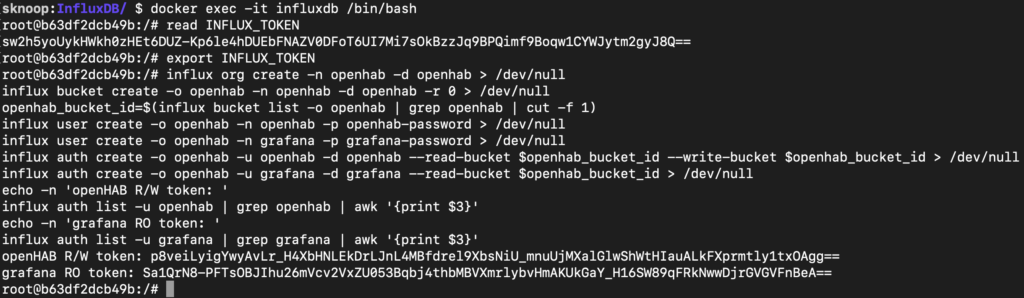
That’s it, InfluxDB is ready, let’s move on.
Step 2 – openHAB
Navigate to your openHAB instance and login with an admin account. Under settings > Other Add-ons, you’ll find the persistence service for InfluxDB. After this, you can either configure your persistence via GUI (other services > InfluxDB persistence service) or via config file. Here’s the config file using the token generated in the step before (it might be necessary to restart openHAB afterwards):
url=http://influxdb-host:8086
version=V2
token=p8veiLyigYwyAvLr_H4XbHNLEkDrLJnL4MBfdrel9XbsNiU_mnuUjMXalGlwShWtHIauALkFXprmtly1txOAgg==
db=openhab
retentionPolicy=openhab
And that’s basically it. Configure the item persistence behaviour the way you prefer and the data should flow to your InfluxDB. Time for visualization!
Step 3 – Grafana
The documentation of how to run grafana (OSS) in docker is extensive, but somehow lacks the information about volumes. You find it in the documentation about how to configure docker – weird. In the end, my grafana service looks like this.
  grafana:
    image: grafana/grafana-oss
    container_name: grafana
    restart: unless-stopped
    volumes:
      - /path/to/docker/volumes/Grafana:/var/lib/grafana
    ports:
      - '3000:3000'
When the container is up and running, navigate to grafana (e. g. http://localhost:3000). The default credentials of grafana are admin:admin. Enter a more secure password and move on.
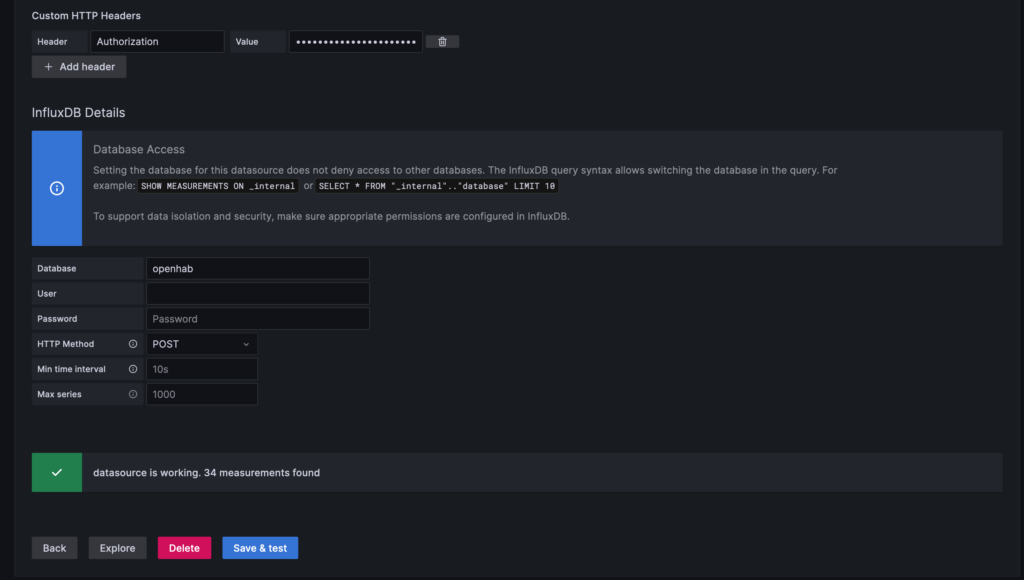
On the bottom left corner, click on the gear icon. Under data sources, add a new one for InfluxDB. If you want to stick with InfluxQL, leave all Auth fields disabled. Instead add a custom header Authorization with the token as value. Important – add the prefix Token (case sensitive!) and a space.
Token Sa1QrN8-PFTsOBJIhu26mVcv2VxZU053Bqbj4thbMBVXmrlybvHmAKUkGaY_H16SW89qFRkNwwDjrGVGVFnBeA==Type in the database name openhab and select „Save & Test“. You should see something like this.
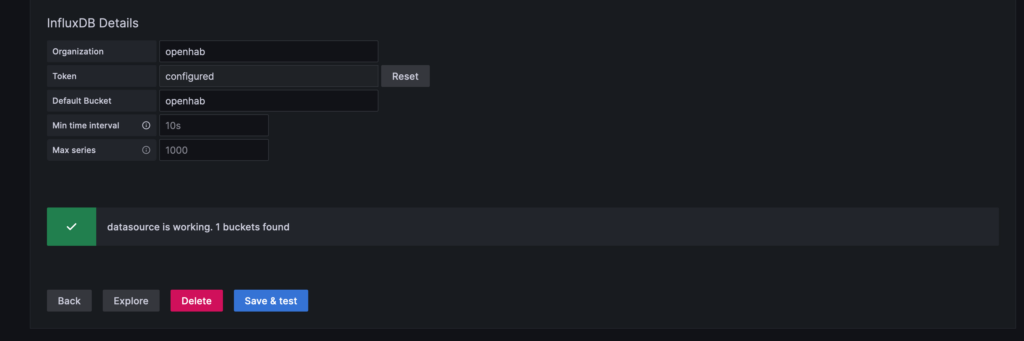
If you prefer the newer Flux language (which as of today is in beta), remove the header and use the token field instead:
Conclusion
Most tutorials simply use default bucket and superadmin for InfluxDB. I prefer to keep my local setup as secure as possible, so I create seperate users for everything. For some reason, it is impossible to create users via InfluxDB’s web GUI and the documentation is… there is room for improvement 😉
openHAB persistence and Grafana (both container and datasource) are straightforward to set up. I can finally disconnect my openHAB from MariaDB and use InfluxDB instead. Now it’s time for some cool dashboards!