Synology offers a wide range of applications to be used on your NAS. Like in Android OS you are even able to install own software packages or use Docker to extend the features. Currently I am using openHAB on a small Linux computer, but want to migrate to Synology. But – does the world really need yet another setup guide for openHAB on DSM?
I read a few tutorials about the usage of openHAB with Synology, which can be divided in two categories – using an application package (like any other DSM application) or running a Docker container. Both ways come with advantages and disadvantages, so let me first of all introduce what I expect to have in the end. This post was intended to be a single post, but it turned out to be really long. For this reason, I divided it into four pieces. This is the first part about the basic setup of openHAB with Synology DSM.
Target situation
In my opinion other tutorials are either wrong (in case of dangerous), while others just do the boring basic stuff. What can you expect in this post series:
✓ Install and run openHAB on Synology NAS with its own user
✓ Access conf folder via network share
✓ Do not share other openHAB directories to the outside
✓ Redirect openHAB logs to Synology Log Center
✓ Use persistence to (re)store item values
✓ Regular backups of the database
Synology offers the possibility to install your own applications directly to the DSM. openHAB offers a special package for this use case, which is nice because you have a fancy icon and small effort. You create a shared directory, install Java (as this is a precondition) and run openHAB. The setup does not offer the possibility to change the user or split up the used directories, so you would have to be careful when creating the shares, because you might overwrite permissions via parent directories. Since I already run openHAB as Docker, let’s skip the package installation and use Docker instead.
openHAB Basic setup
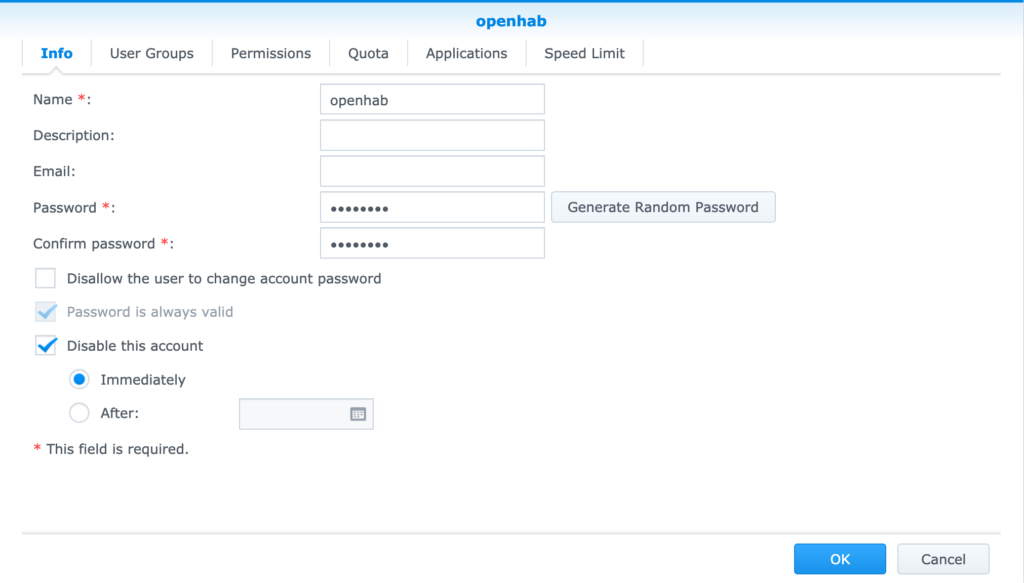
First, go to your Control Panel, select User (you may need to enable Advanced Mode) and create a new user called openhab, but disable the account after creation.
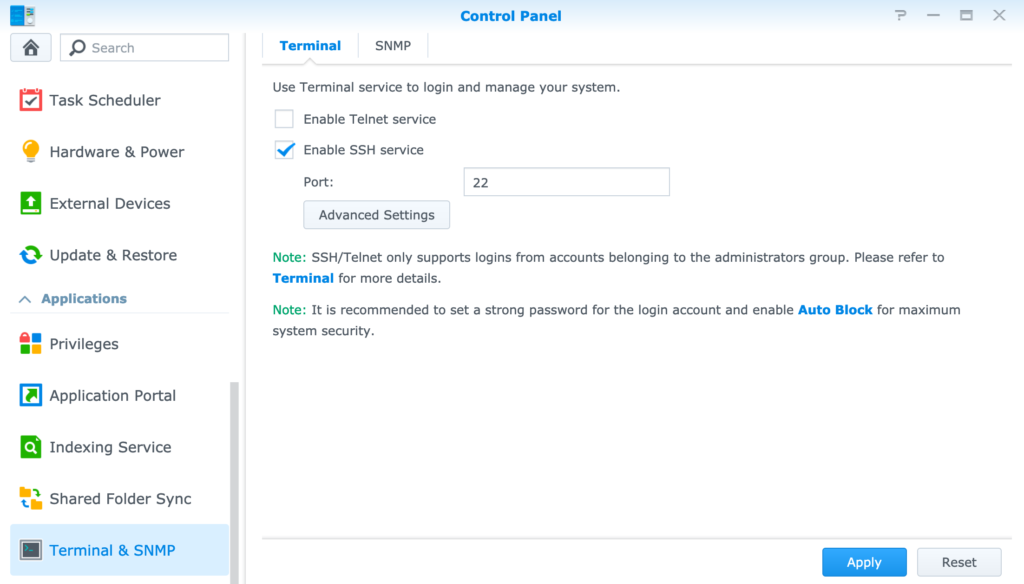
Also in Control Panel, select Terminal & SNMP and enable the SSH service.
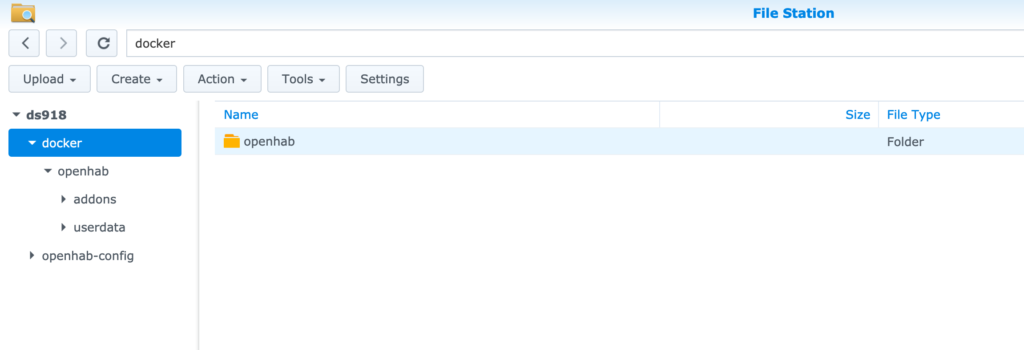
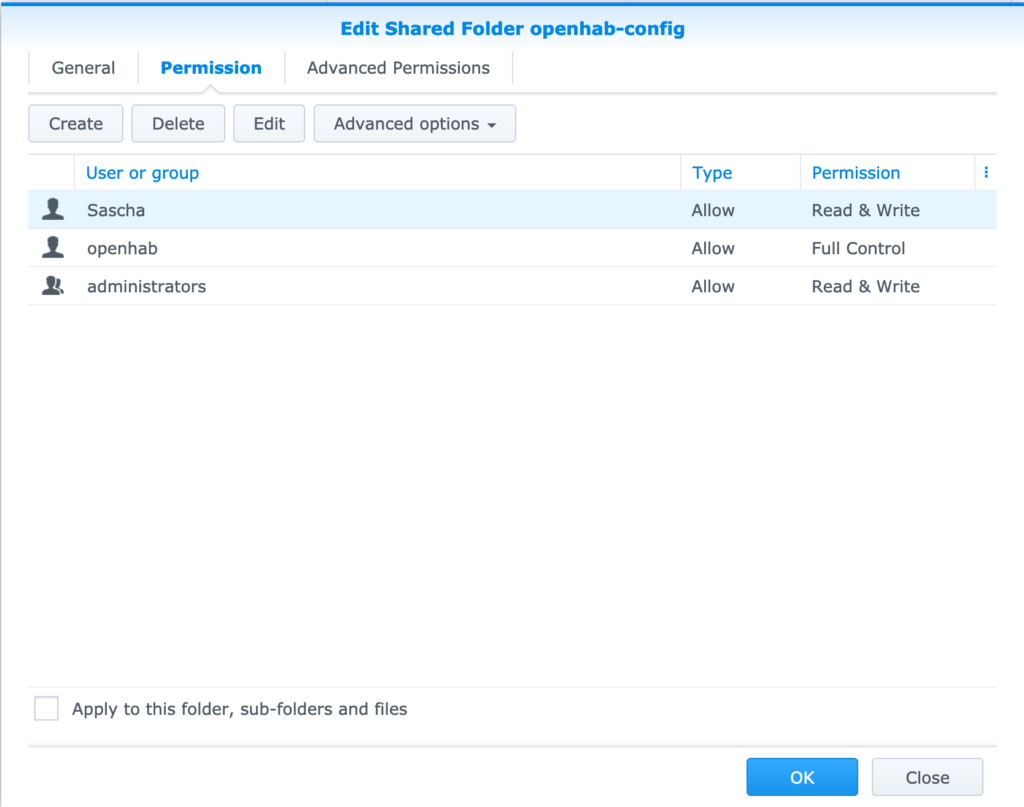
If you haven’t done this yet, install Docker via DSM application store. This will also create a shared folder called „docker“. On the description page of the openHAB docker image they use three volumes for addons, config and userdata. I’m not sure whether the addon directory should be treated as secret, but at least the folder userdata contains internal information that usually does not require (or even should not allow) user access – yes, I know, strange name selection for this directory. For my setup, addons and userdata will stay private while conf will be shared via network. I like to divide persistent volumes by container name. Open the File Station and navigate to the docker folder. Create a folder called „openhab“ with two subdirectories „addons“ and „userdata“. Go to the Control Panel and create a new share „openhab-config“.
Now you have to edit the permissions for openhab-config (but not for the others). Grant full access for the openhab user and read/write-access to any user/group you prefer. For some reason every user has read access to docker by default. Delete this permission.
Since DSM does not allow you to get the user id behind a user (or at least I did not find any way for this), you need a SSH-enabled terminal application. Connect to your disk station using and run the following command to get the user ID:
cat /etc/passwd | grep openhab | cut -d: -f3And this one for the group ID:
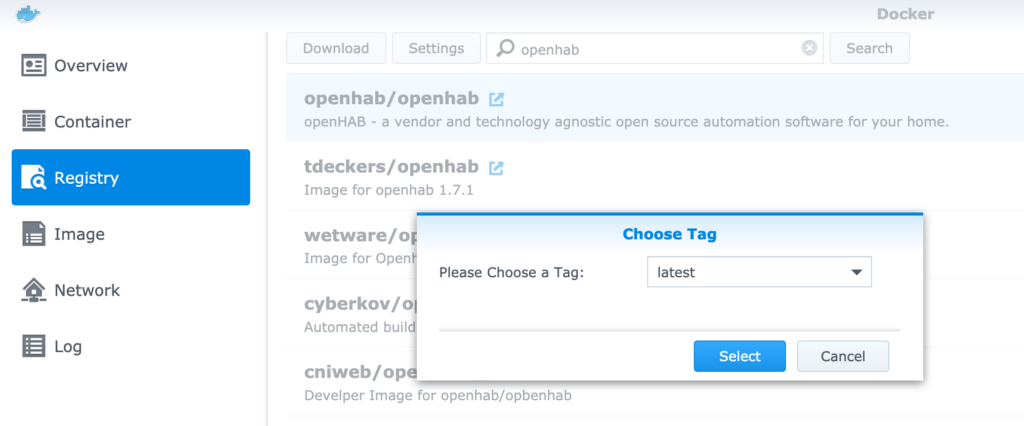
cat /etc/group | grep users | cut -d: -f3In DSM, open the Docker application and search for openHAB in the Registry. Double click openhab/openhab and select a fitting tag (e.g. latest).
After the download has finished, go to Image, select openHAB and click Launch. Choose a name for your container and click Volume. As mentioned, you will need three volumes: addons, conf and userdata. Within the container, the volumes are mounted to /openhab/*. Create the volumes for addons and userdata pointing to the subdirectories of docker share and conf volume at the second share.
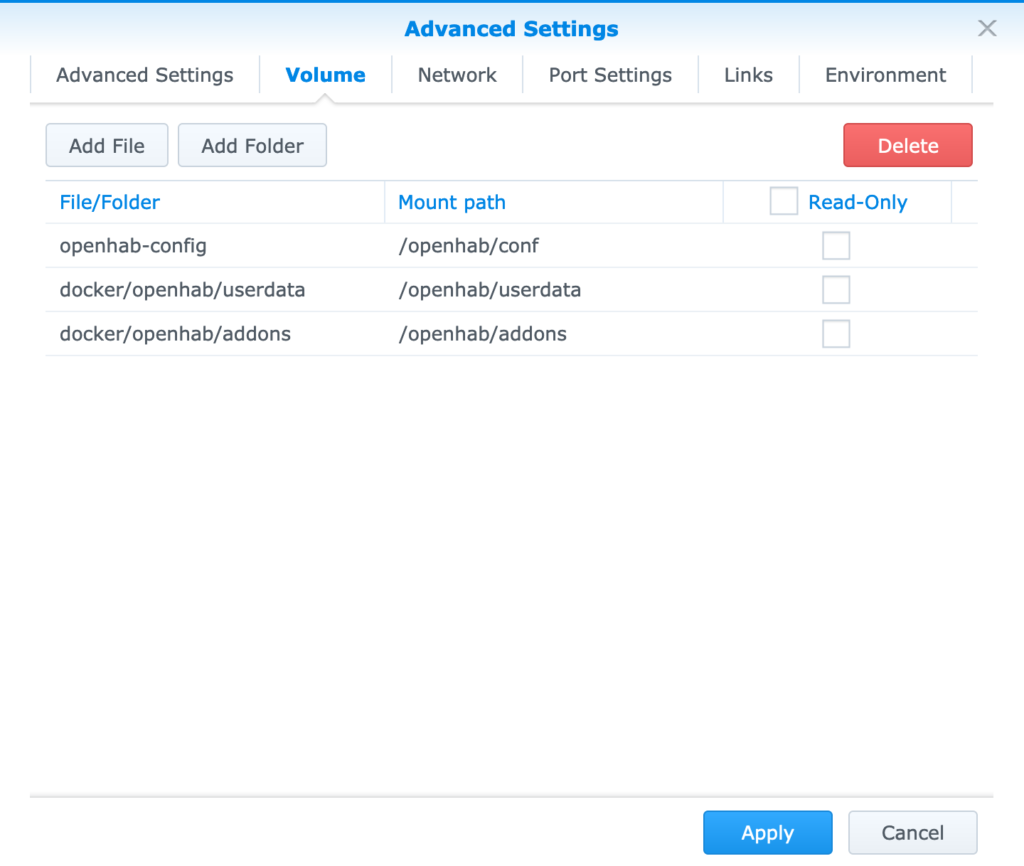
If you need this (as I currently do), enable host networking on Network tab. After this, move over to the Environment tab. Change the USER_ID and GROUP_ID to the values you got from the commands before.

Apply your settings and spin up the container. Now your openHAB should be available on the configured ports. Configure some bindings and move over to the next part of this article. Since we won’t use the SSH access again in this tutorial, you can disable it.
Part 1: Use openHAB with Synology DSM
Part 2: MySQL persistence for openHAB
Part 3: Redirect openHAB logs to Log Center
Part 4: Scheduled database backups with DSM